Got both Loyalistic and PlanMill and want to transfer contacts between them? You can set up integration between the systems to do just that.
Getting API tokens
To set up the necessary client credentials in PlanMill, follow these steps:
- Log in to your PlanMill instance, https://online.planmill.com/**YourInstance**/.
- Go to https://online.planmill.com/**YourInstance**/api/registrations.jsp.
- You can create new credentials by following the instructions on the page. After creating the credentials, copy Client ID and Client Secret as we will be using them later.
Setting up PlanMill integration in Loyalistic
When you have both Client ID and Client Secret, you can continue to set up the integration in Loyalistic. Log in to Loyalistic at https://app.loyalistic.com/suite/ (if not done already).
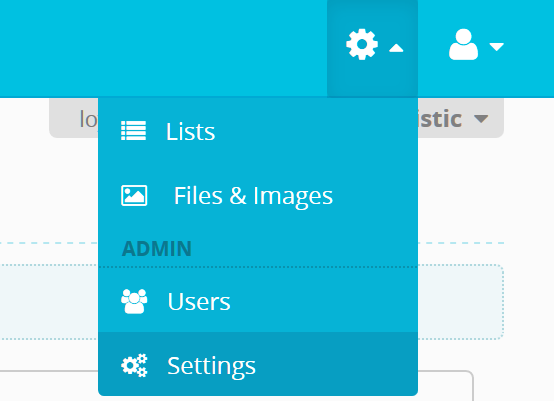
- In the upper right corner, click on the gear icon and select Settings.
- On the Settings page, select Integrations.
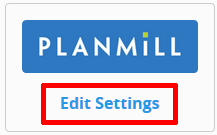
- On the Integrations page, click on the Edit Settings link under PlanMill logo.
- In the PlanMill Settings window, set up your integration details:
- Enabled: whether or not the PlanMill integration is enabled.
- Instance name: the name of your instance, as it is written in your instance URL. This is used to connect to your instance.
- Client ID: your PlanMill client ID (the one you created earlier).
- Client secret: your PlanMill client secret (the one you created earlier).
- Action title: the text shown on the action in PlanMill. You can add the contact's company name to the deal title by adding text "{company}" to it.
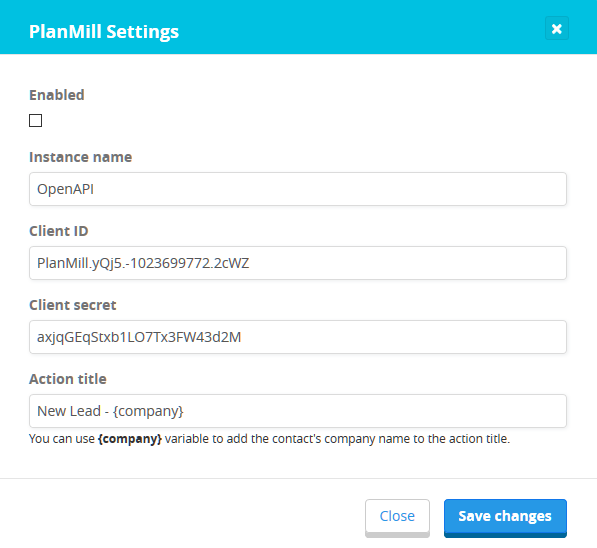
After you have set up the details, press Save changes to enable your PlanMill integration. The PlanMill logo on the Integrations page will now show a green check mark on it indicating that the integration has been enabled.

Sending contacts to PlanMill
After enabling PlanMill integration, PlanMill-related functions will become available on the contact pages. For example sending several contacts at once to PlanMill can be done on the contacts page by first selecting the contacts to be sent by clicking on checkboxes next to contacts. A toolbar will appear on top of the list. From there, you can select Send to PlanMill to send the selected contacts.

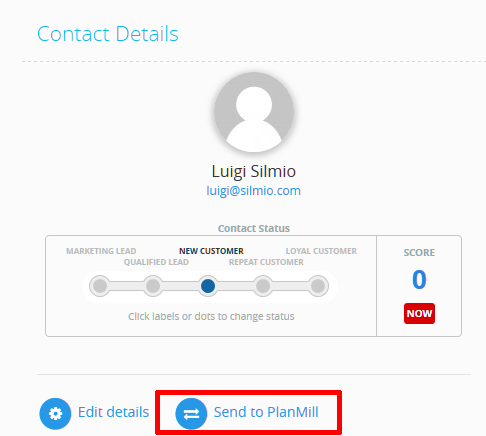
You can also send individual contacts to PlanMill by clicking on the contact name. On the contact page, select Send to PlanMill.
When a contact is sent to PlanMill, the following steps are taken in the background:
- First, Loyalistic checks if the contact's company ("account" in PlanMill) already exists in your PlanMill, searching by the company name. If the company is not found yet, a new company is created.
- Next Loyalistic checks if the contact already exists in your PlanMill, searching by the email address. If the contact is not found, a new contact is created and attached to the company.
- A new action is added, with the contact attached to it.
Getting contacts from PlanMill
You can import contacts from PlanMill to Loyalistic. Importing is done through lists:
- In the upper right corner, click on the gear icon and select Lists.
- On the Lists page, select a list by clicking on its' name.
- On the list page, click on the Import button and select From PlanMill.
- Select a PlanMill Campaign to be used when selecting contacts in PlanMill for importing. Campaigns are set in PlanMill.
- Select the Status for imported contacts. All contacts imported from PlanMill will be set this status.
- Click Import to start the import process. When the import is done, the browser will be redirected to the list page.
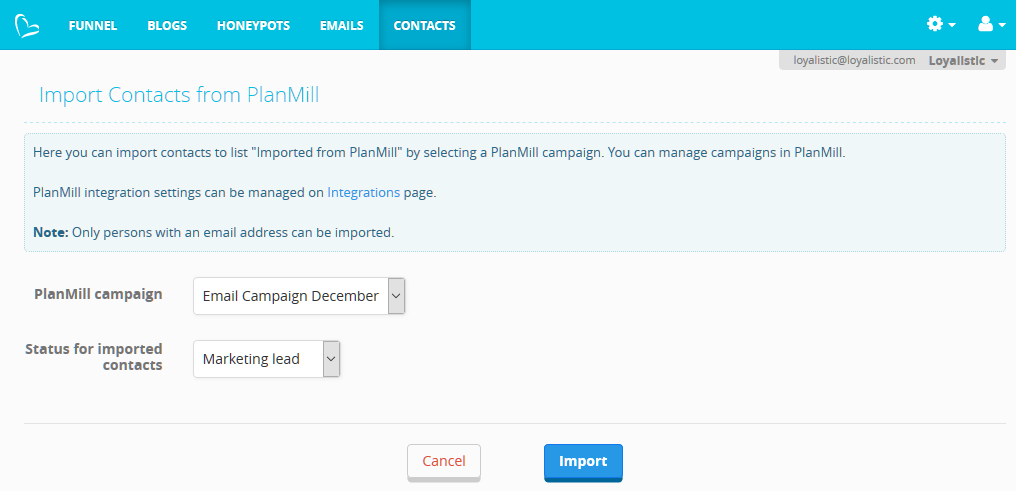
Note: Only contacts with an email address can be imported. If there are contacts without an email address, they will be ignored by the import process.