Posts in How To

Using images on landing pages and blog posts

Monday, October 11, 2021

This article is outdated and has been replaced by a newer version. Please see Adding images to Loyalistic.

This article is kept here for reference.

Adding images to content, such as landing pages, blog posts or emails happens thru getImageRight, our digital asset management system. You need to sign up on the first time you are adding an image. After that, a login is required on each session. But the advantages are well worth the login hassle. Every image you use, is stored for further use. You can easily crop and resize images, so no need for photoshopping. This all means that you can import the original high resolution image, and getImageRight resizes it for you. Then if you later need the image in another blog post, email or landing page, getImageRight has stored your original high resolution version so you can crop and resize it differently, if you want.

Signing up

To start, click  icon on the editor. See below where to find the icon.
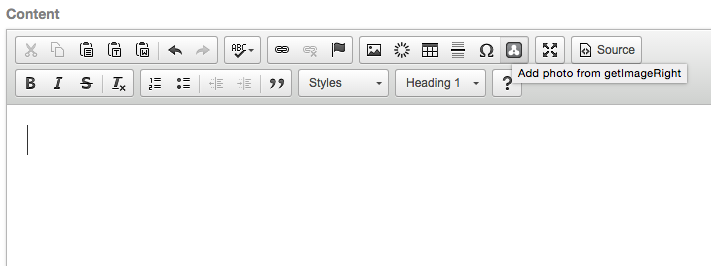
Unfortunately, the signup and login screens sometimes defaults to Finnish language version. The application itself is available in English. So here are instructions of how to progress through the sign up process if you get Finnish screens.
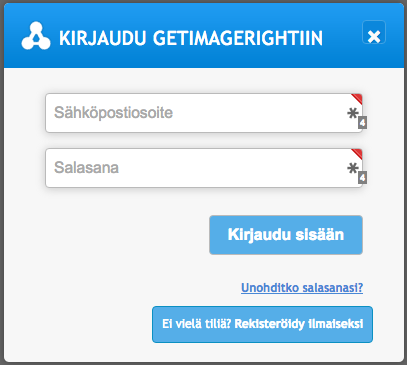
This is the login screen. Select the button on the bottom for signing up. Full translations below.

  • KIRJAUDU GETIMAGERIGHTIIN: LOGIN TO GETIMAGERIGHT
  • Sähköpostiosoite: Email address
  • Salasana: Password
  • Kirjaudu sisään: Login
  • Unohtuiko salasanasi?: Forgot your password?
  • Ei vielä tiliä? Rekisteröidy ilmaiseksi: No account? Signup for free.
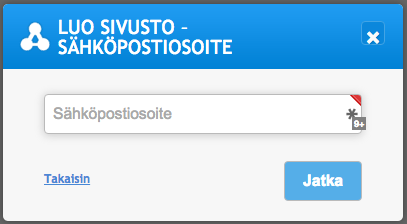
Fill your email address and click "Jatka" to continue.

  • LUO SIVUSTO - SÄHKÖPOSTIOSOITE: Create site - email address
  • Sähköpostiosoite: Email address
  • Takaisin: Back
  • Jatka: Continue

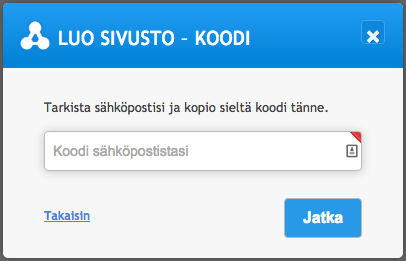
Check your email and copy code to complete site setup. Click "Jatka" to continue.

  • LUO SIVUSTO - KOODI: Create site - Code
  • Tarkista sähköpostisi ja kopio sieltä koodi tänne.: Check your email and copy code here.
  • Koodi sähköpostistasi: Code from your email
  • Takaisin: Back
  • Jatka: Continue

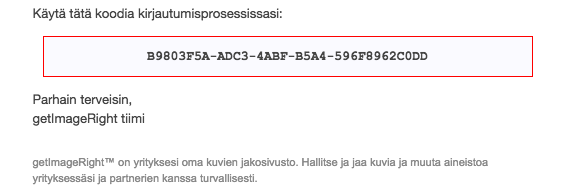
Copy the code from the email that was sent to you and paste it the form.
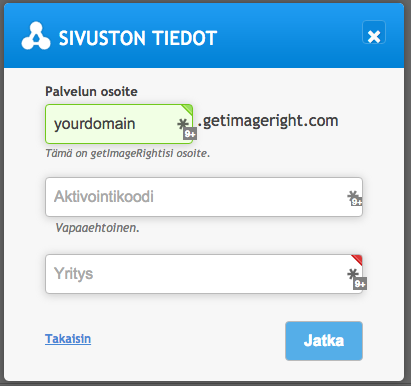
Now select the address for your site. It's typically yourdomain.getimageright.com where yourdomain is prefilled from your email address. If the site name is taken, someone from your organisation may have already signed up. In that case, you may signup for another instance with separate name, or ask the other person to invite you to her instance. See separate instructions of how to use getImageRight.

Leave Aktivointikoodi (Activation Code) empty. Fill out Yritys (Company) field, and click "Jatka" to Continue.

  • Sivuston tiedot: Site information
  • Palvelun osoite: Site address
  • Tämä on getImageRightisi osoite: This is your getImageRight's address
  • Aktivointikoodi: Activation code
  • Vapaaehtoinen: Optional
  • Yritys: Company
  • Takaisin: Back
  • Jatka: Continue 

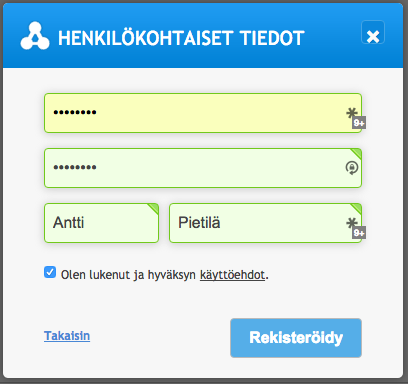
Select password (first field) and again (second field). Fill your first and last names. Select checkbox to approve Terms and Conditions (same as Loyalistic's). Click "Rekisteröidy" to Compete signup.

  • Henkilökohtaiset tiedot: Personal information
  • Salasana: Password
  • Salasana uudestaan: Verify password
  • Etunimi: First name
  • Sukunimi: Last name
  • Olen lukenut ja hyväksynyt käyttöehdot: I have read and approved terms and conditions.
  • Takaisin: Back
  • Rekisteröidy: Complete signup

Your getImageRight is being set up. Please wait. It will last about 1 minute.
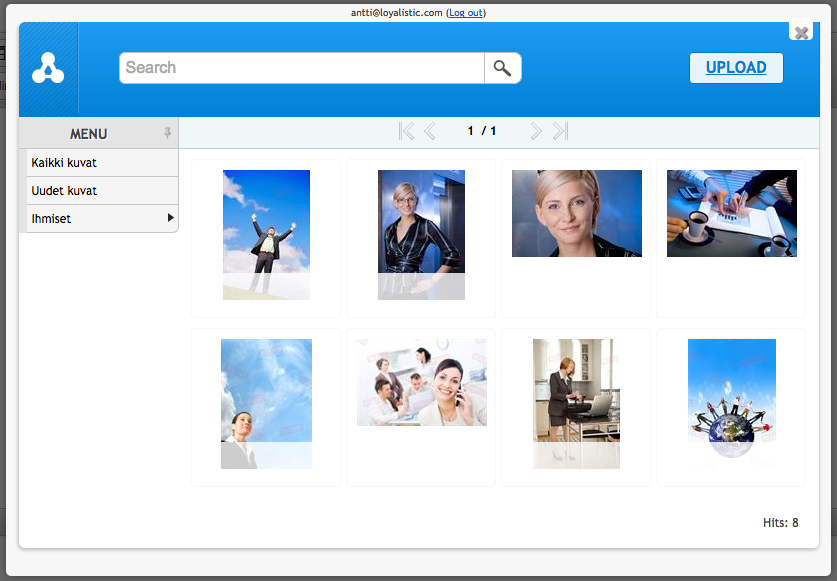
You have now completed the signup and are ready to use getImageRight.

Use Upload-button to upload new images, or search and select one you have uploaded before. Your getImageRight contains the above watermarked images "out-of-box". You may delete them later.

The category menu on the left will update with the categories you are using for your images once you start uploading your images.
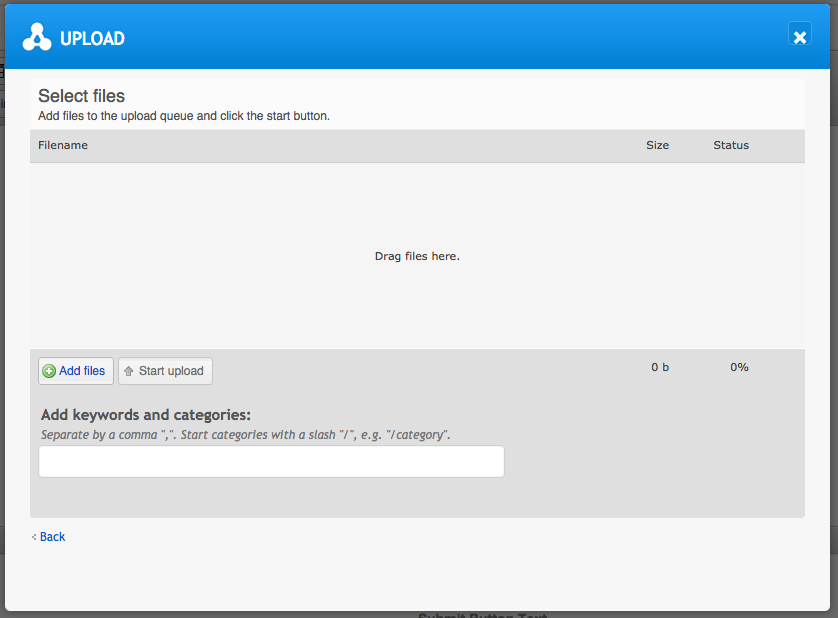
Use Add Files -button to add files to be uploaded or drag and drop files here. Click Start upload to upload them. In normal use, you'll upload one image at a time, but you may upload as many as you like. It's better to do that from the full getImageRight, that you'll find from the address you created, aka yourdomain.getimageright.com.
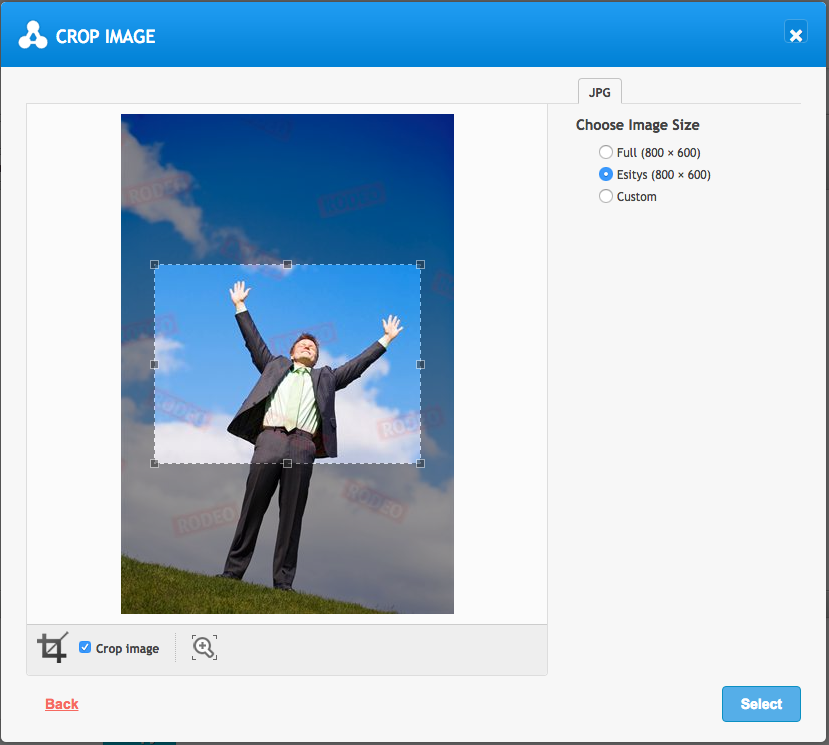
Once you have uploaded or selected an image, you may resize and crop it, if you like. Once done, click Select to complete the process.

If you want to add more preset sizes to resize options, you can do so from the full getImageRight at yourdomain.getimageright.com.
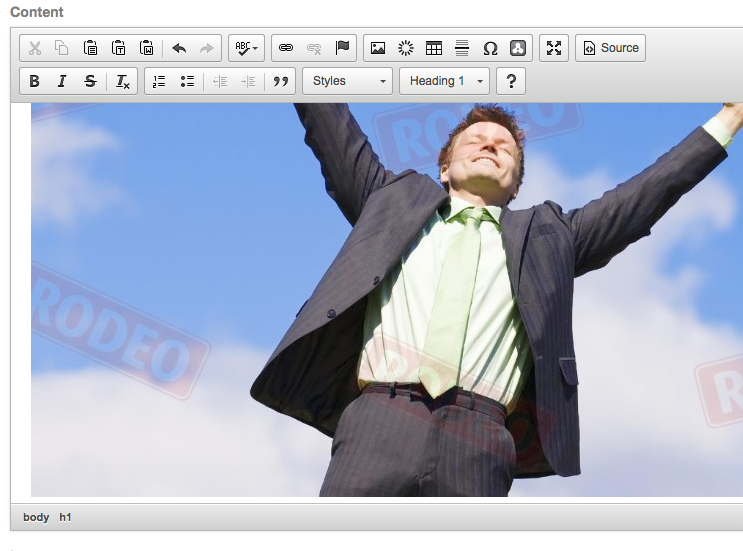
Voila. The image is there! Don't mind too much about the image size in the editor. Images are here shown 100%, but are scaled down to fit in the actual blog or landing page. Please note thought, that on emails, the images are not scaled down.

Add a Honeypot link to a blog post

Monday, October 11, 2021

Getting the link to your Honeypot

  1. Select Honeypots from the menu.
  2. Select your Honeypot from the list.
  3. On the right-side menu, click on the Get link button.
  4. Select the appearing address and copy it to your clipboard.

Setting the link to a blog post

  1. Select Blogs from the menu.
  2. Select your blog post from the list.
  3. In the text editor, highlight the text you wish to link to your Honeypot.
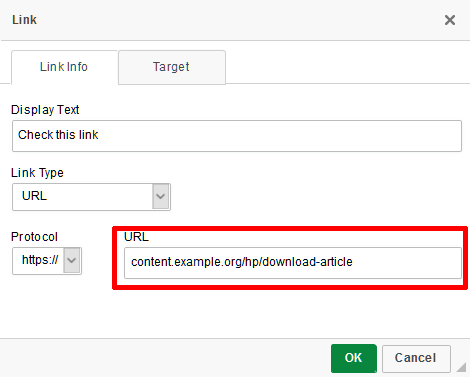
  4. In the editor menu, select the link button.
  5. Paste the Honeypot URL to the URL field and click OK.

Using Loyalistic API

Monday, October 11, 2021

Introduction

Loyalistic API is a Representational State Transfer (REST) API, providing access to most of Loyalistic functionality. You can use it to integrate your own applications with Loyalistic.

Getting Started

Since Loyalistic API is a REST API, working with JSON (JavaScript Object Notation) objects, it’s easy to start experimenting with it. You can use any REST client, but we are using Postman in these examples.

Getting the API Documentation

Loyalistic API is documented using the OpenAPI/Swagger specification. You can use the specification directly to create your own API client, by using for example Swagger Editor.

The most up-to-date documentation can be found at https://api.loyalistic.com/v1/swagger and the Swagger specification in JSON format at https://api.loyalistic.com/v1/swagger/docs/v1.

Registering Your Client

Each request to Loyalistic API needs to be authenticated. The authentication is done using the OAuth 2.0 Client Credentials Grant flow, which means you must first register your client with Loyalistic before you can get access.

You can register your client and get the client credentials at https://app.loyalistic.com/Suite/Settings/ApiKeys (you need to be an Admin to access the page). The steps are as follows.

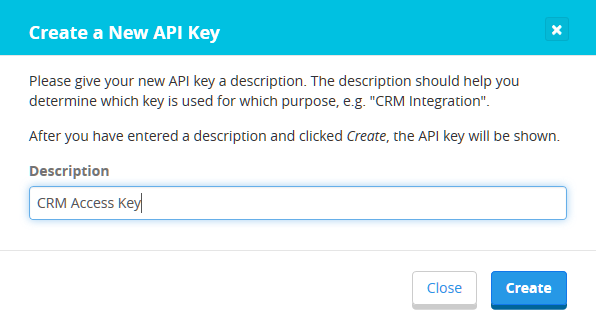
  1. Click on the Add a new API key button.
  2. Enter a description for your key, such as "CRM Access" and click Create.
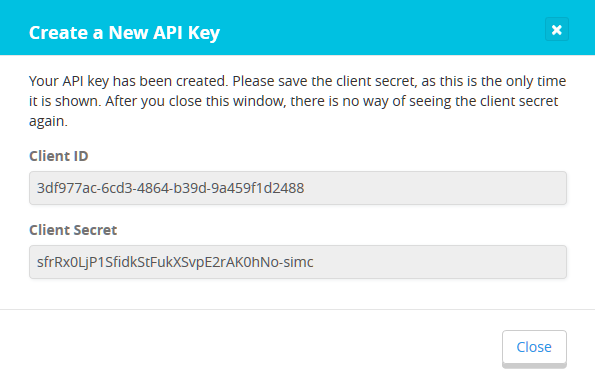
  3. A new Client ID with a Client Secret will appear. Save those to a secure location, as they are used to access the Loyalistic API. This is the only time the Client Secret will be shown.
  4. After you have saved the credentials, click Close. The new key will be added to the list of API keys.

Using the Crendentials (in Postman)

In the OAuth 2.0 Client Credentials Grant flow you will use the registered API key (Client ID and Client Secret) to get a token from an authentication server. You then use that token to access the API, sending the token with each request in the Authorization header.

In general, these are the steps needed to access the API:

  1. Send a POST request https://auth.loyalistic.com/oauth2/token.
    • Use Basic authentication and send your Client ID and Client Secret as the username and password.
    • Add one form field, "grant_type" with the value of "client_credentials".
  2. If the sent credentials were correct, the authentication server will respond with a JSON object, containing the access token ("access_token"), the type of the token ("token_type") which will always be "bearer" and the token validity time in seconds ("expires_in").
  3. Send your request to the Loyalistic API (e.g. "GET https://api.loyalistic.com/v1/lists/") with the following header:
    • Authorization: Bearer {put the access_token here}

Exclude recipients from email sending

Monday, October 11, 2021

Sometimes there's a need to exclude some contacts when sending an email. Let's imagine you have a list of contacts imported to Loyalistic from your CRM and you would like to send an email about a current offer to all your contacts. But some of the contacts have already taken up on your offer, so you don't want to send the email to those contacts. What to do?

You could of course create a new list with only those contacts who have not already used the offer, but depending on the number of contacts/lists that might be cumbersome. It's easier to send the email to everyone and specifically exclude some contacts when sending. Here's how you do it:

  1. Log in to Loyalistic, if not already done.
  2. Go to Lists.
  3. Create a new list used for exclusion by clicking New List. Give the new list a name (e.g. "Offer Used") and click Save list.
  4. Add the contacts to the list, either by adding them one by one by clicking Add New... or by importing from a file or from your CRM.
  5. When your list is ready, it's time to create the email. Select Emails from the menu.
  6. Click on the "Create email" button, give the email a name, select a template and click Create.
  7. Make sure you have the correct details under Basic info and some content in the email body. Remember to save.
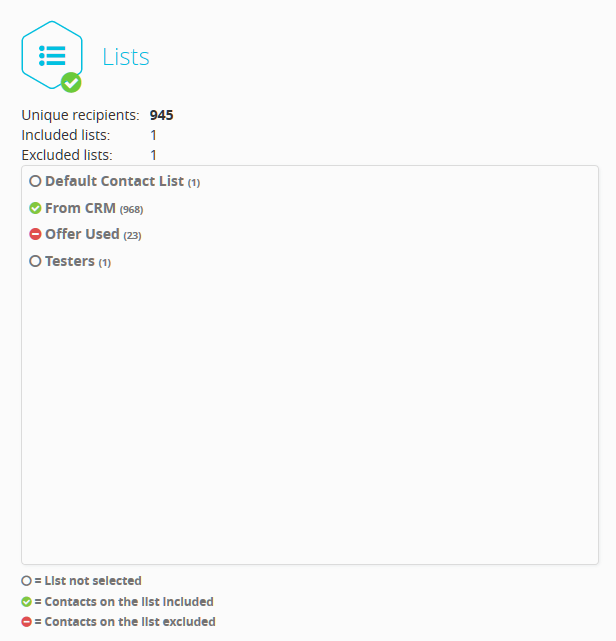
  8. Under the Lists header you can see all the lists available. The icon before the list name indicates if the list is to be used or not when sending this email. The empty ring means the list will not be used, the green check mark means the list will be used and the red minus means contacts on that list will be excluded when sending the email. Select the list(s) you wish to send the email to by clicking on the list name once. The icon will turn green.
  9. Now, select the list you wish to exclude from the sending by clicking the name of that list twice.
  10. You can see the effect of your choices above the lists. Unique recipients is the number of contacts the email will be sent, after contacts have been excluded. Included lists is the number of lists you have selected to be included and Excluded lists the number of lists you have excluded. When you are happy with your selections, save the email.
  11. Now you are ready to send. Send yourself a test email first to see that everything looks good, and if satisfied with the end result, send the email to the recipients.

Screenshot of the list selector.

Solving email delivery problems

Monday, October 11, 2021

Emails not delivered or marked as spam when send to YOUR domain

Your organization's email server may reject or mark as spam internal email coming from outside from Loyalistic. Email sent from your email domain to the same domain is considered internal email and shouldn't come from outside, right? This does not mean that other contacts are not receiving your emails. You just need to ask your email server admin to whitelist Loyalistic.

Emails not delivered or marked as spam

When an email server receives email it runs number of checks to determine whether it is likely to be spam or not.

One such test is to check whether it is really coming from where it says it is. Your DNS (Domain Name Server) contains information about e.g. what is your website's and mail server's IP-address, but it may also contain information about your outbound email servers. If such a record exists and Loyalistic is not listed, this may be the reason.

If your DNS have SPF-record, add Loyalistic to ensure email delivery. You can find instructions how to do it in the application, by going to Settings / Customize / Domains & URLs.

Delivery delayed

6 – 10 / 17