Posts in October 2021

Adding images to Loyalistic

Monday, October 11, 2021

Need to add images to a Honeypot landing page or to a blog post? You can upload them to Loyalistic and use them wherever you want.

Uploading files

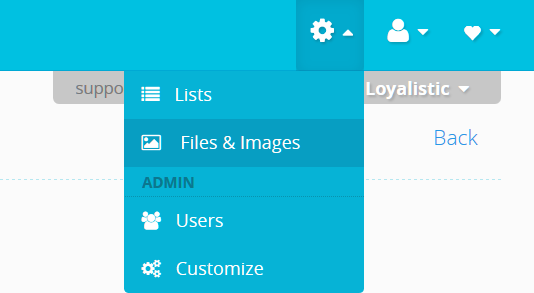
To upload files, click on the gear icon on the upper right corner and select Files & Images.

When the Files page opens, click on the Upload... button. Select the file and click Upload.

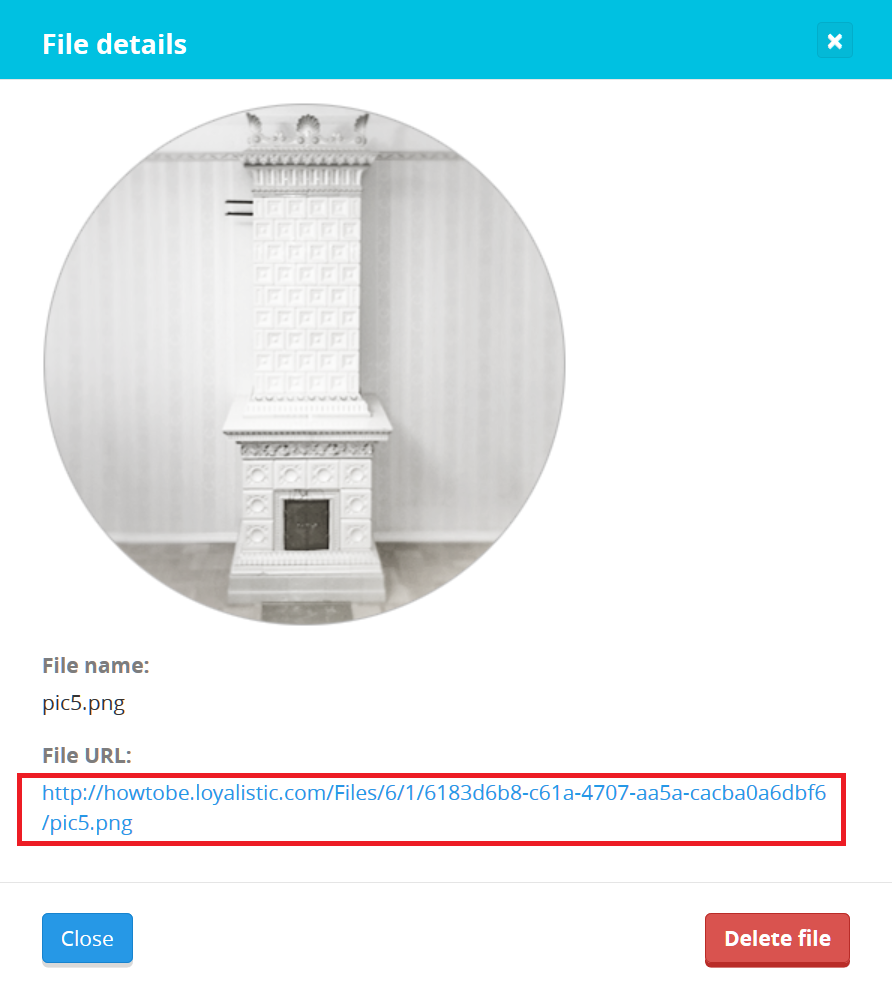
When the file has finished uploading, click on the file on the list. The details window opens where you can see the public URL (File URL) of the file. You can use this URL to add images to a Honeypot, blog post and more.


Using an image

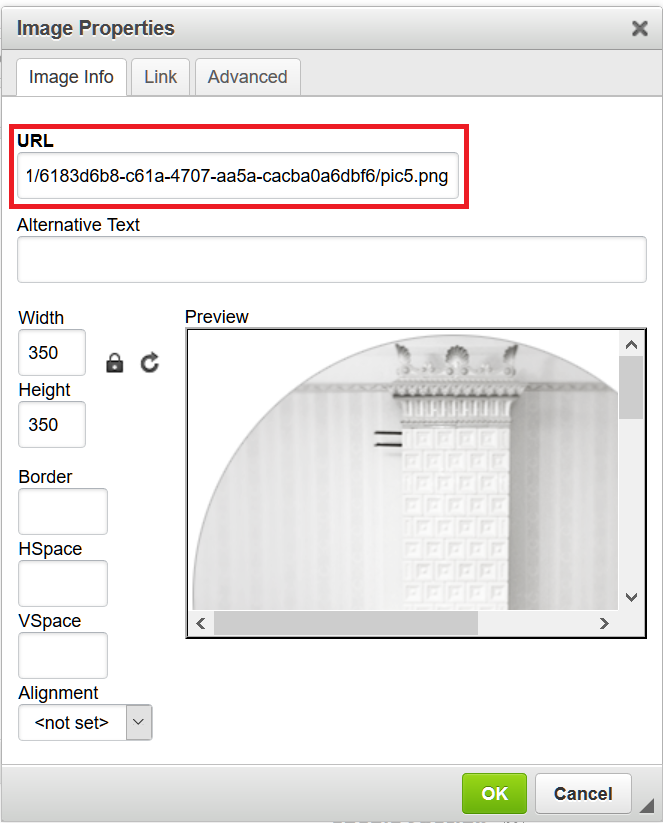
To add the image for example to a Honeypot landing page, use the Image function in the text editor.

The the image properties window opens, paste the file URL to the URL field. Then click OK and you're done.

Adding a bait link to Honeypot

Monday, October 11, 2021

You can add a bait link to your Honeypot's conformation page and email by clicking the Add link to file icon on the editor toolbar (see image below).

This will insert a {link} placeholder, which will then be replaced automatically by Honeypot when a user fills out the form.

If your bait is a file, the {link} text on the confirmation page and on the email will be replaced by a link button with text "Download" (or "Lataa", if you have selected the Finnish language), leading to the bait file. If the bait is an URL, the {link} text will be replaced by a link to the bait URL. There will be no description text on the link. It is not possible to change the link text.

If you decide to add the {link} placeholder by hand, make sure that the placeholder does not contain any formatting or additional characters, just the text link inside curly braces. Otherwise Honeypot will not be able to replace the placeholder with the correct link.

Adding a custom link

If you need to add a link to an external URL with a custom text (e.g. "See the video here"), you need to circumvent the standard link adding methods. Basically you need to skip adding {link} placeholders altogether and add the links manually. Just do these steps:

  1. In "What's in your bait?" section, select "Nothing".
  2. Add the links to the confirmation page and email by using the editor's link button (see image below).

Using images on landing pages and blog posts

Monday, October 11, 2021

This article is outdated and has been replaced by a newer version. Please see Adding images to Loyalistic.

This article is kept here for reference.

Adding images to content, such as landing pages, blog posts or emails happens thru getImageRight, our digital asset management system. You need to sign up on the first time you are adding an image. After that, a login is required on each session. But the advantages are well worth the login hassle. Every image you use, is stored for further use. You can easily crop and resize images, so no need for photoshopping. This all means that you can import the original high resolution image, and getImageRight resizes it for you. Then if you later need the image in another blog post, email or landing page, getImageRight has stored your original high resolution version so you can crop and resize it differently, if you want.

Signing up

To start, click  icon on the editor. See below where to find the icon.
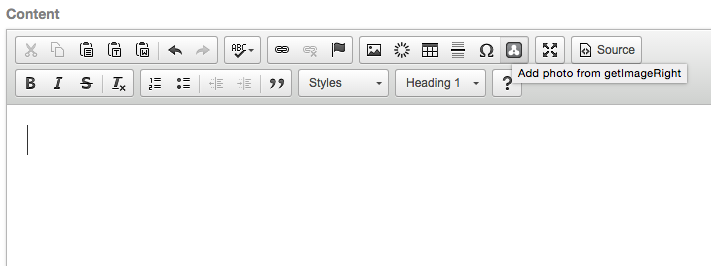
Unfortunately, the signup and login screens sometimes defaults to Finnish language version. The application itself is available in English. So here are instructions of how to progress through the sign up process if you get Finnish screens.
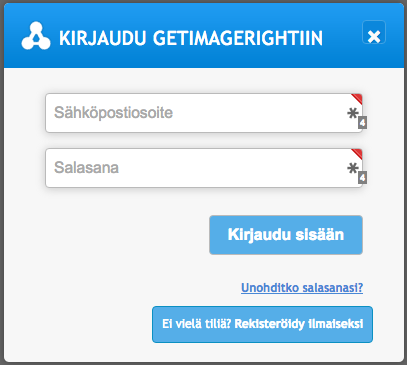
This is the login screen. Select the button on the bottom for signing up. Full translations below.

  • KIRJAUDU GETIMAGERIGHTIIN: LOGIN TO GETIMAGERIGHT
  • Sähköpostiosoite: Email address
  • Salasana: Password
  • Kirjaudu sisään: Login
  • Unohtuiko salasanasi?: Forgot your password?
  • Ei vielä tiliä? Rekisteröidy ilmaiseksi: No account? Signup for free.
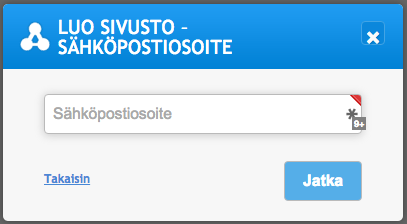
Fill your email address and click "Jatka" to continue.

  • LUO SIVUSTO - SÄHKÖPOSTIOSOITE: Create site - email address
  • Sähköpostiosoite: Email address
  • Takaisin: Back
  • Jatka: Continue

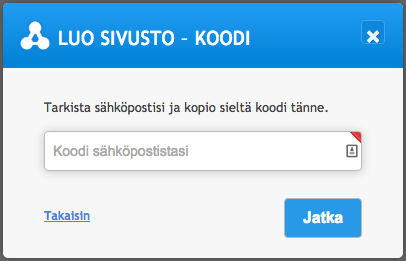
Check your email and copy code to complete site setup. Click "Jatka" to continue.

  • LUO SIVUSTO - KOODI: Create site - Code
  • Tarkista sähköpostisi ja kopio sieltä koodi tänne.: Check your email and copy code here.
  • Koodi sähköpostistasi: Code from your email
  • Takaisin: Back
  • Jatka: Continue

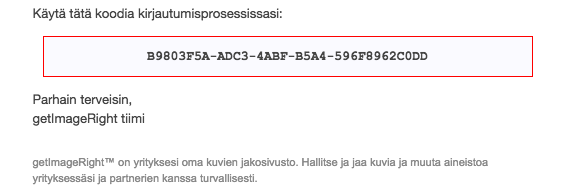
Copy the code from the email that was sent to you and paste it the form.
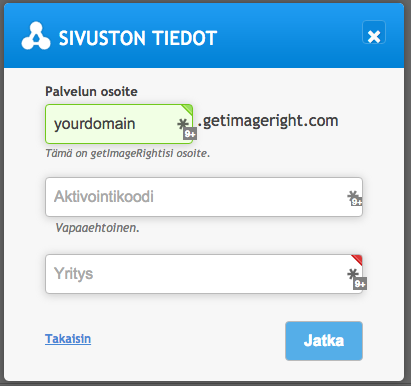
Now select the address for your site. It's typically yourdomain.getimageright.com where yourdomain is prefilled from your email address. If the site name is taken, someone from your organisation may have already signed up. In that case, you may signup for another instance with separate name, or ask the other person to invite you to her instance. See separate instructions of how to use getImageRight.

Leave Aktivointikoodi (Activation Code) empty. Fill out Yritys (Company) field, and click "Jatka" to Continue.

  • Sivuston tiedot: Site information
  • Palvelun osoite: Site address
  • Tämä on getImageRightisi osoite: This is your getImageRight's address
  • Aktivointikoodi: Activation code
  • Vapaaehtoinen: Optional
  • Yritys: Company
  • Takaisin: Back
  • Jatka: Continue 

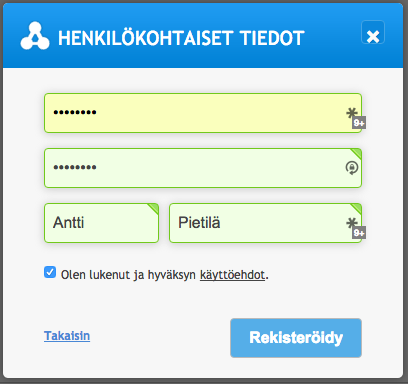
Select password (first field) and again (second field). Fill your first and last names. Select checkbox to approve Terms and Conditions (same as Loyalistic's). Click "Rekisteröidy" to Compete signup.

  • Henkilökohtaiset tiedot: Personal information
  • Salasana: Password
  • Salasana uudestaan: Verify password
  • Etunimi: First name
  • Sukunimi: Last name
  • Olen lukenut ja hyväksynyt käyttöehdot: I have read and approved terms and conditions.
  • Takaisin: Back
  • Rekisteröidy: Complete signup

Your getImageRight is being set up. Please wait. It will last about 1 minute.
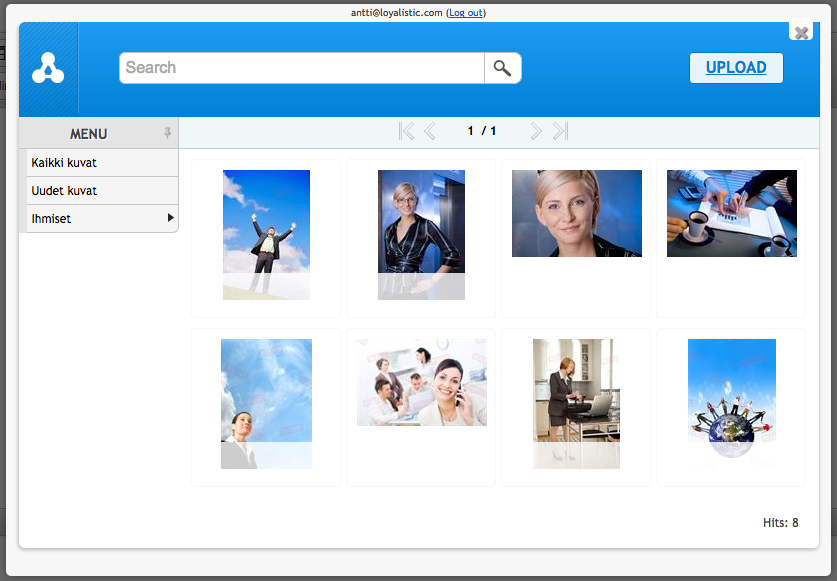
You have now completed the signup and are ready to use getImageRight.

Use Upload-button to upload new images, or search and select one you have uploaded before. Your getImageRight contains the above watermarked images "out-of-box". You may delete them later.

The category menu on the left will update with the categories you are using for your images once you start uploading your images.
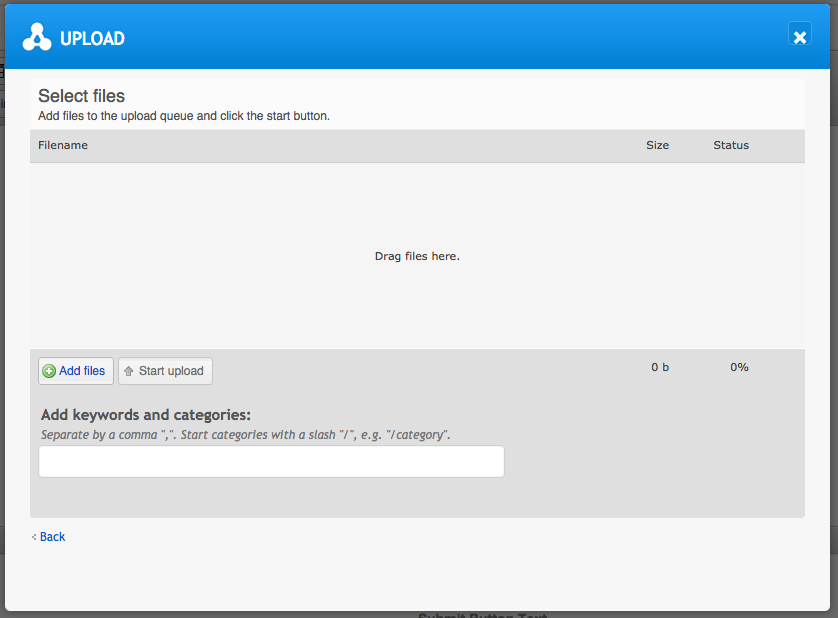
Use Add Files -button to add files to be uploaded or drag and drop files here. Click Start upload to upload them. In normal use, you'll upload one image at a time, but you may upload as many as you like. It's better to do that from the full getImageRight, that you'll find from the address you created, aka yourdomain.getimageright.com.
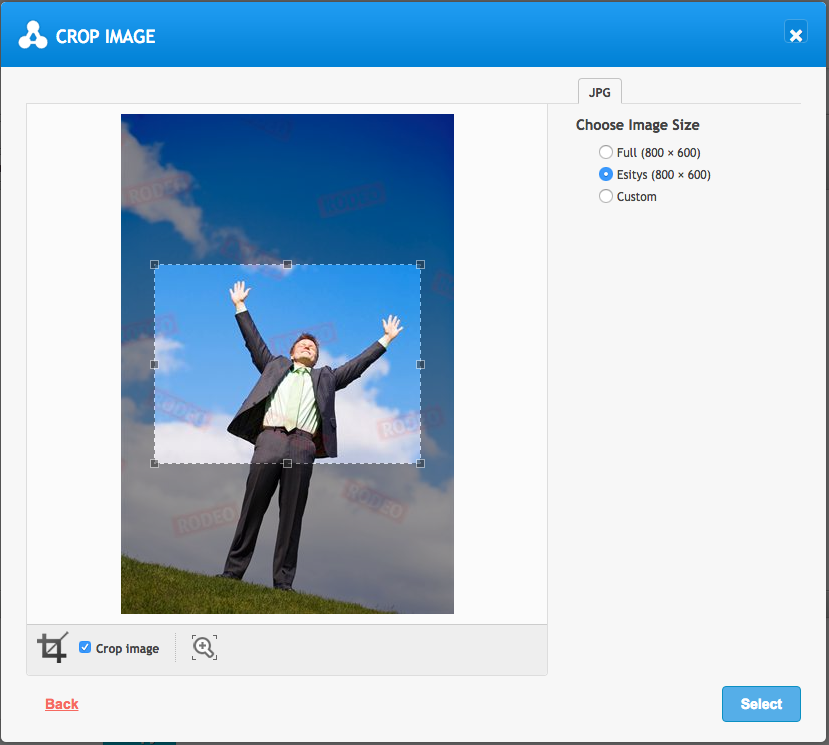
Once you have uploaded or selected an image, you may resize and crop it, if you like. Once done, click Select to complete the process.

If you want to add more preset sizes to resize options, you can do so from the full getImageRight at yourdomain.getimageright.com.

Voila. The image is there! Don't mind too much about the image size in the editor. Images are here shown 100%, but are scaled down to fit in the actual blog or landing page. Please note thought, that on emails, the images are not scaled down.
How to read email statistics

Monday, October 11, 2021

Note: These figures change while emails are being sent out, opened and clicked.

Sent

Number of unique email addresses this email have been sent. This figure may be smaller than unique recipients of the email as invalid, non-working addresses and those with marketing ban are filtered out.

Opened

Number of recipients who have opened the email showing images such as your logo. Emails have a personalised tracking pixel that needs to be shown in order to register as an open. However as most email clients suppress images by default and require user to allow them for a new sender, this figure is highly unreliable especially for lists with many new recipients and between lists with different audience profiles e.g. private vs corporate.

Clicked

Number of recipients who have clicked at least one link in the email. This is reliable figure however not all clicks turn into views as inpatient users especially on mobile devices may not wait until the page loads.

Bounced

Number of recipients the email was sent but could not been delivered. If this happens for a permanent reason or repeatably for a recipient, the email address is closed out from further use by banning marketing with reference to reason. This keeps your list in good shape. In case of a temporary reason, the figure is not updated if the email is successfully delivered on a retry.

Expect high bounce rate if you haven't used a list for a while as people change jobs.

Most organizations close mailboxes when a person leaves the company, while some set an out-of-office autoreply which is not registered here. It's a good practice to checked bounced addresses here as well as go thru the out-of-office messages sent to the sender's inbox to see if a key person has left and a new contact should be found.

On the list view, the date and time is the first time email was opened, clicked or bounced, and is not updated on further opens, clicks or in case of later successful delivery.

What is counted as a Contact?

Monday, October 11, 2021

Your plan is limited to certain number of contacts, but what is counted as a contact here?

In short: A unique email address you can send marketing to.

Each unique email address creates a contact within Loyalistic. It's case insensitive, thus it does not matter whether it's written in upper or lower case.

In technical sense, you won't have duplicate email addresses.

However people might use multiple email addresses or have multiple domain names or email aliases connected to the same mailbox. Each creates separate contact. There is no technical way to detect which belong to the same person and which are a different person.

The next thing is whether you can send marketing to the address?

You can if the contact belongs to at least one list, the contact have not banned marketing, and the address is still working. If the delivery fails for a permanent reason, the contact is blocked and omitted from further attempts or campaigns.

11 – 15 / 31